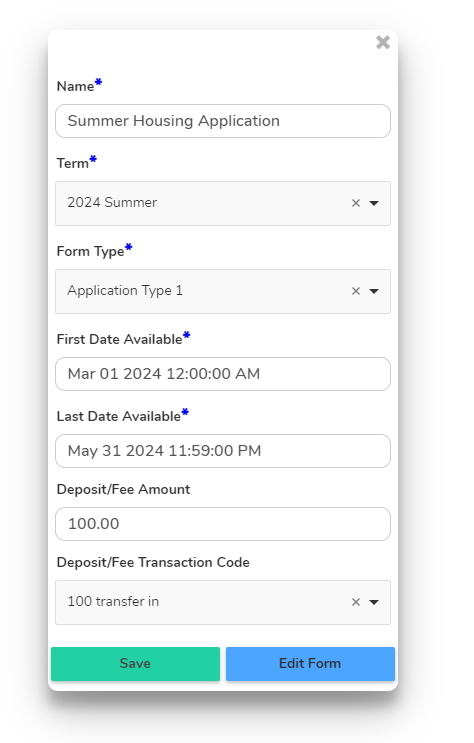
Use the following procedure to edit a Form definition:
1. Select Forms from the Web section of the Setup menu. The Forms page is displayed.
2. If necessary, search for a Form definition.
3. Click Edit next to a Form.
4. Edit the following information, as necessary:
•Name – Enter the name of the Form. This is the Form name displayed to patrons in the GET mobile app.
•Term – Select the term associated with the Form. Terms are defined via Setup > Global > Terms.
•Form Type – Select the Form’s Form Type from one of the Form groups. Form Types are used to categorize forms.
The Form Type drop-down menu is organized by Form Type. Form Types are defined via Setup > Web > Form Types.
•First Date Available – Enter or select the date and time the Form is first available for patrons to access.
•Last Date Available – Enter or select the date and time when the Form is no longer available for patrons to access.
•Deposit/Fee Amount – Edit the deposit or fee amount if there is an amount set associated with the Form. This is the amount the patron is required to pay when submitting the form.
Note: The Deposit/Fee Amount field only applies to Application and Contract Form Types.
•Deposit/Fee Transaction Code – Select a Payment type transaction code to associate with the deposit or fee transaction for an Application or Contract. For more information about transaction codes, refer to the Configure Transaction Codes for an Account section.
Note: The Deposit/Fee Transaction Code field only applies to Application and Contract Form Types.
5. Click Save to save the general Form settings and return to the Forms grid, or click Edit Form to save the Form definitions and edit the elements of the Form or edit the patron requirements for the Form.
